🌟 This is Truewatchshop apps based on expresscart by Markmoffat
Check out expresscart documentation 📖 here.
ℹ️ Intention:
The purpose of Truewatchshop is to provide a training sandbox environment for customers and partners.
This sandbox allows users to explore, experiment, and learn about monitoring, tracing, and application performance management using Truewatch in a safe, hands-on setting.
Application has been instrumented, focus of the training sandbox is how to onboard the data and get familiar to Truewatch platform and workflow.
🛠️ Tech Stack
The project is built using the following technologies:
- Node.js: 🟢 Backend runtime environment for running JavaScript.
- Express.js: 🚀 Web framework for building the application.
- MongoDB: 🗄️ NoSQL database for storing application data.
- Docker: 🐳 Containerization platform for deploying the application.
- Nginx: 🌐 Web server used as a reverse proxy.
- Truewatch RUM / APM / LOG: 📊 Monitoring and tracing tool for performance and debugging.
⚙️ Pre-requisites
Before you begin, please make sure you have the following:
-
Truewatch Account 📝
Register for a Truewatch account at truewatch.com to access monitoring and analytics features. -
Linux System with Internet Connection 💻
Use a Linux machine (physical or virtual) with a stable internet connection.Tip: We recommend using a Linux VM for isolation and ease of setup. If you don’t have one, you can use Oracle VirtualBox for Windows machine or OrbStack for MacOS to create a virtual environment.
This training sandbox is created using Orbstack and Ubuntu 22.04.5 LTS.- If you choose to use Orbstack, you can find the install guide here.
- If you choose to use Virtualbox, you can find the install guide here.
Create a Linux VM with Ubuntu 22.04.5 LTS.
-
DataKit Installed 📦
Install DataKit from your Truewatch account to enable tracing and monitoring.
More on Official Datakit installation here.To install your Datakit:
-
Go to your Truewatch platform, and log in with your Truewatch credentials.
-
Navigate to Integrations > Datakit.
-
Copy the Deploy Script highlighted in green as shown in the snapshot below.
-
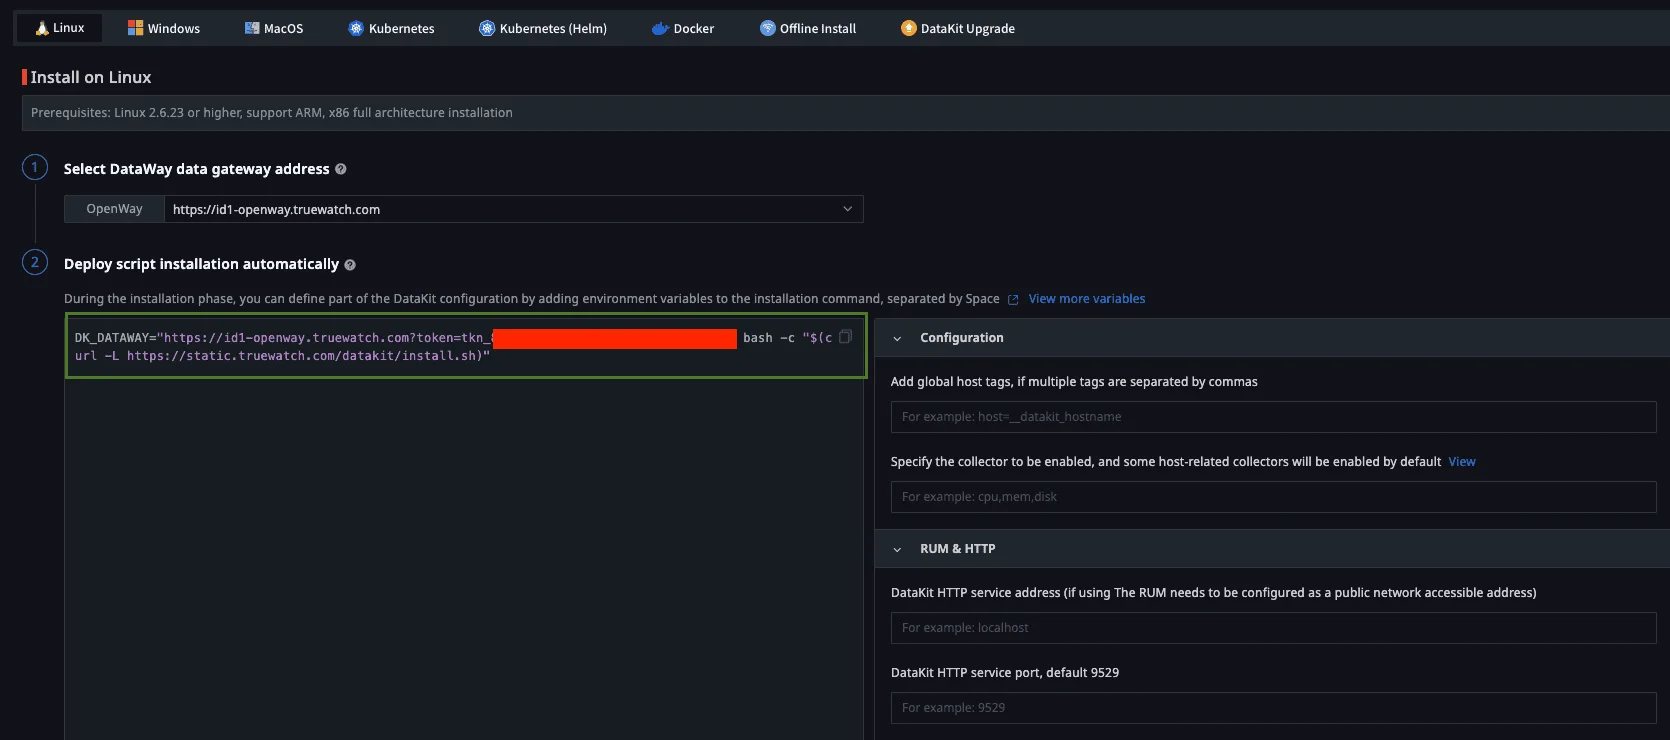
- Go to your freshly installed Linux machine and apply the Deploy Script in the console:
DK_DATAWAY="https://id1-openway.truewatch.com?token=tkn_xxxxxxxx" bash -c "$(curl -L https://static.truewatch.com/datakit/install.sh)" - Verify datakit is running:
ps aux | grep datakit
root         806 11.6  0.3 2036304 34012 ?       Sl   01:59 116:22 /usr/local/datakit/externals/datakit-ebpf run --datakit-apiserver 0.0.0.0:9529 --hostname ubuntu --l7net-enabled httpflow --pprof-host 127.0.0.1 --pprof-port 6061 --netlog-metric --netlog-log --trace-env-list DK_BPFTRACE_SERVICE,DD_SERVICE,OTEL_SERVICE_NAME --enabled ebpf-net,ebpf-trace
-
Docker 🐳
Install Docker to run the application in containers.
Get Docker instructions here.sudo apt-get update sudo apt-get install -y git docker.io docker-compose sudo usermod -aG docker $USER newgrp dockerNote: The last two commands add your user to the
dockergroup so you can run Docker withoutsudo. You may need to log out and log back in for this. -
Git 🧰
Install Git to clone the repository and manage source code:sudo apt-get update sudo apt-get install -y git
🚀 Steps to Set Up the Project
-
Clone the repository:
git clone https://github.com/TrueWatchTech/expresscart-demo-setup-guide cd expresscart-demo-setup-guide -
Install dependencies and build the project:
docker-compose build -
Start the services:
docker-compose up -d -
Populate the database with test data:
docker exec -it expresscart npm run testdata -
[Optional] Customize product image:
- Go to the Truewatchshop admin page.
- Login using the following credentials:
- Username:
[email protected] - Password:
test
- Username:
- Navigate to Products.
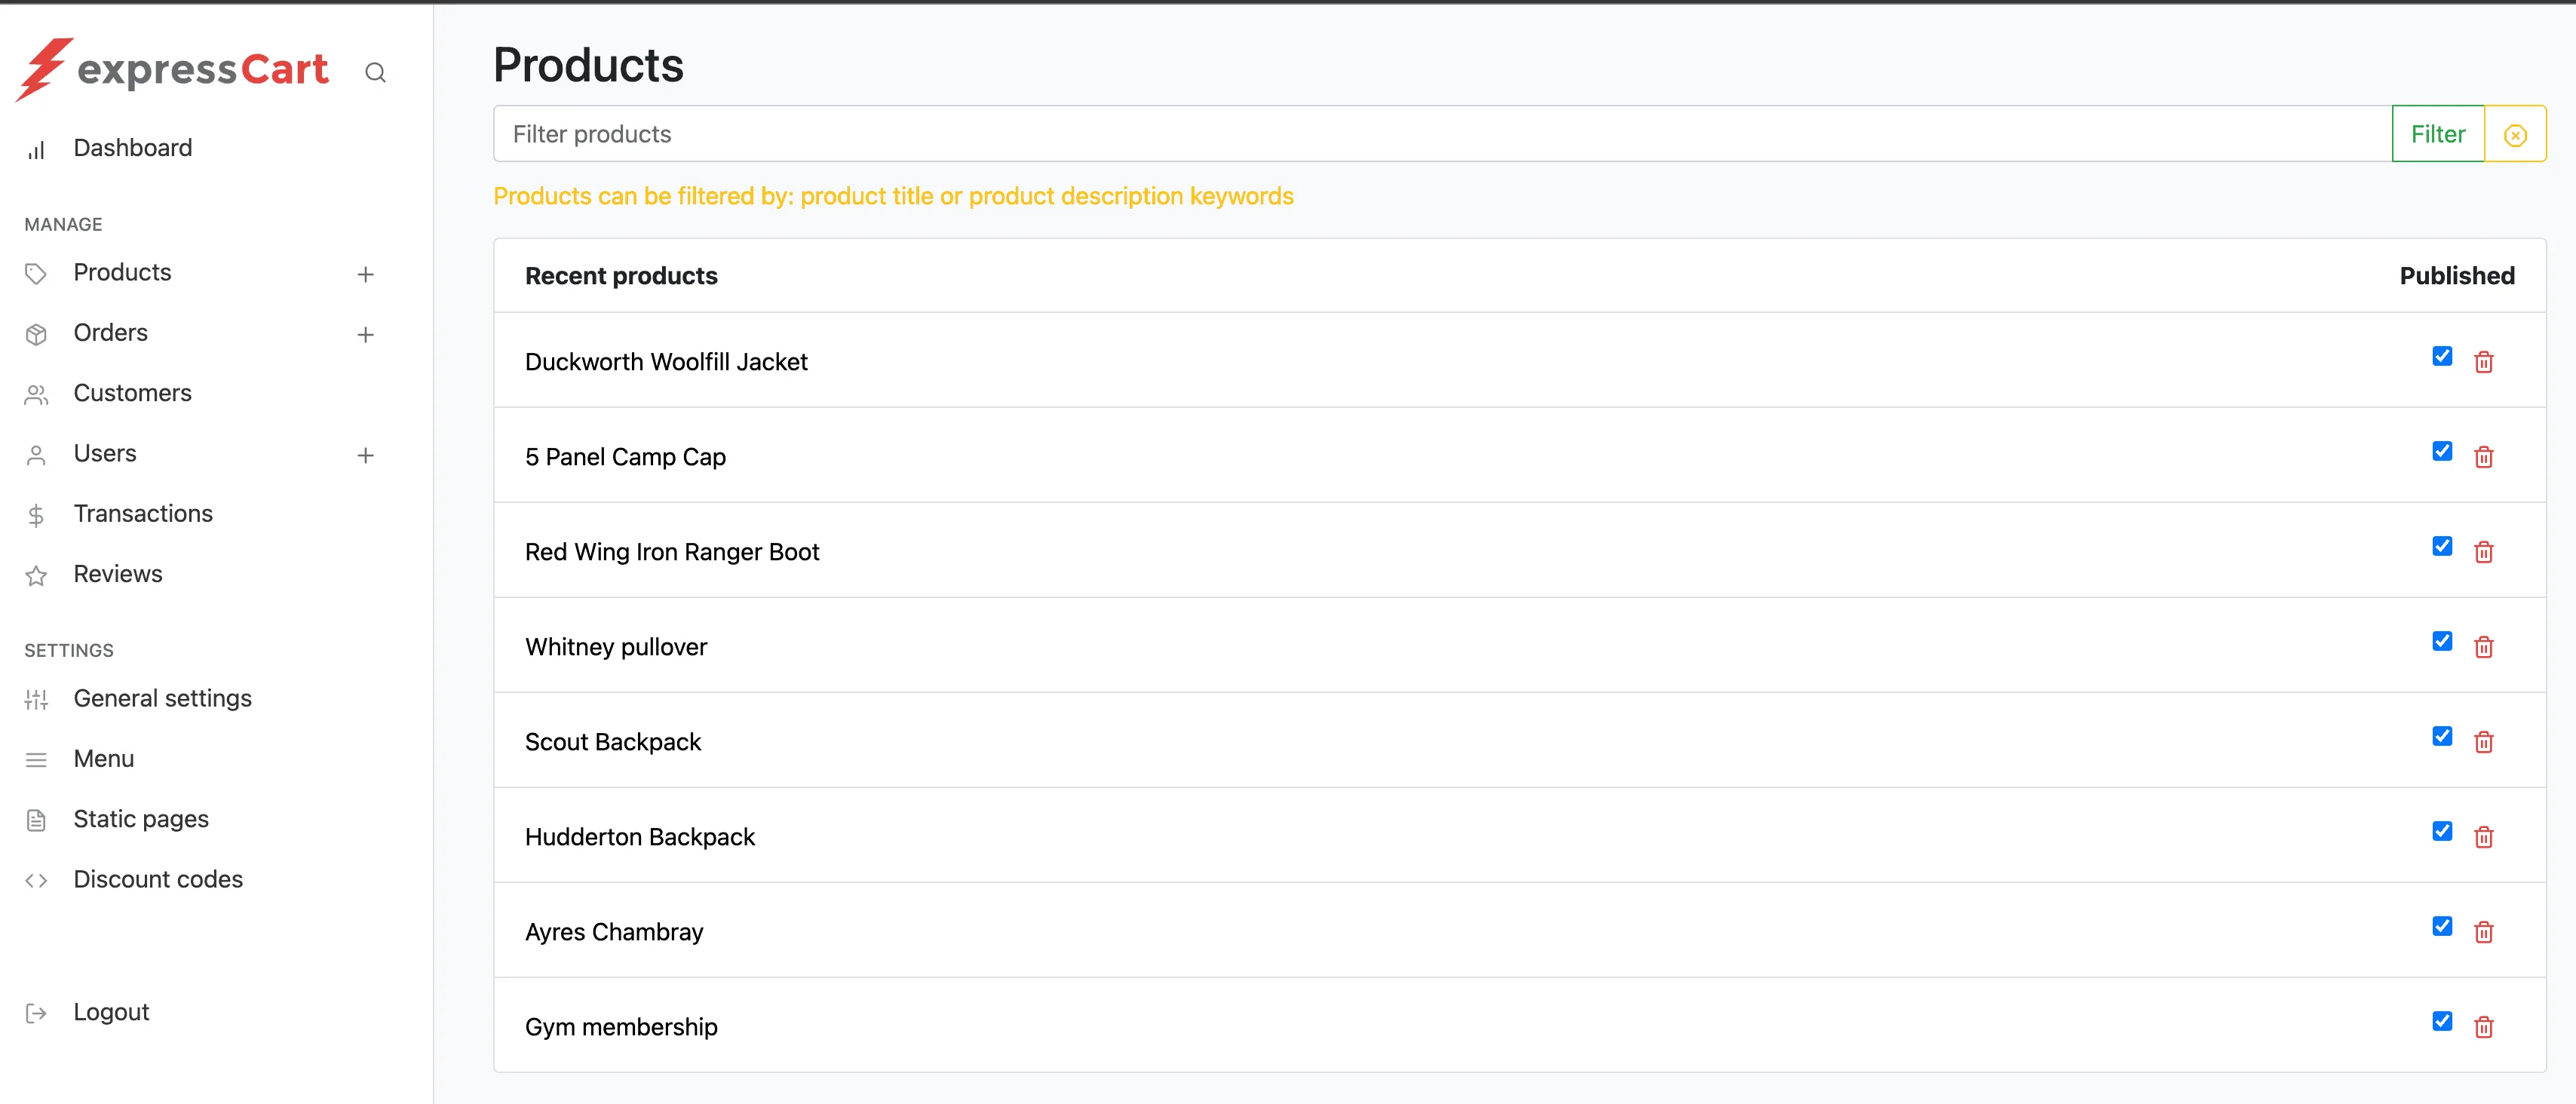
-
Locate the product "Duckworth Woolfill Jacket" and click on add image URL at the bottom. A Product Image URL window will appear.

- Open a new browser tab and search for an image URL on Google using the keyword Duckworth Woolfill Jacket. For example, you can use this URL:
https://content.steepandcheap.com/images/items/large/FJR/FJRZ0M5/GRE.jpg. - Copy the URL to the Product Image URL and add the image.
- Repeat the above steps for other products to update their image URLs.
Note: You can monitor image load times from RUM stats.
📊 Steps to Set Up Infra Monitoring
-
By installing Datakit as shown in the Step 3 Pre-requisites section.
The Linux host installed with datakit will send its metrics data to the Truewatch platform.
Validate this by going to your Truewatch platform.
Navigate to Infrastructure > Host. Click on Honeycomb to change the view to Honeycomb View.
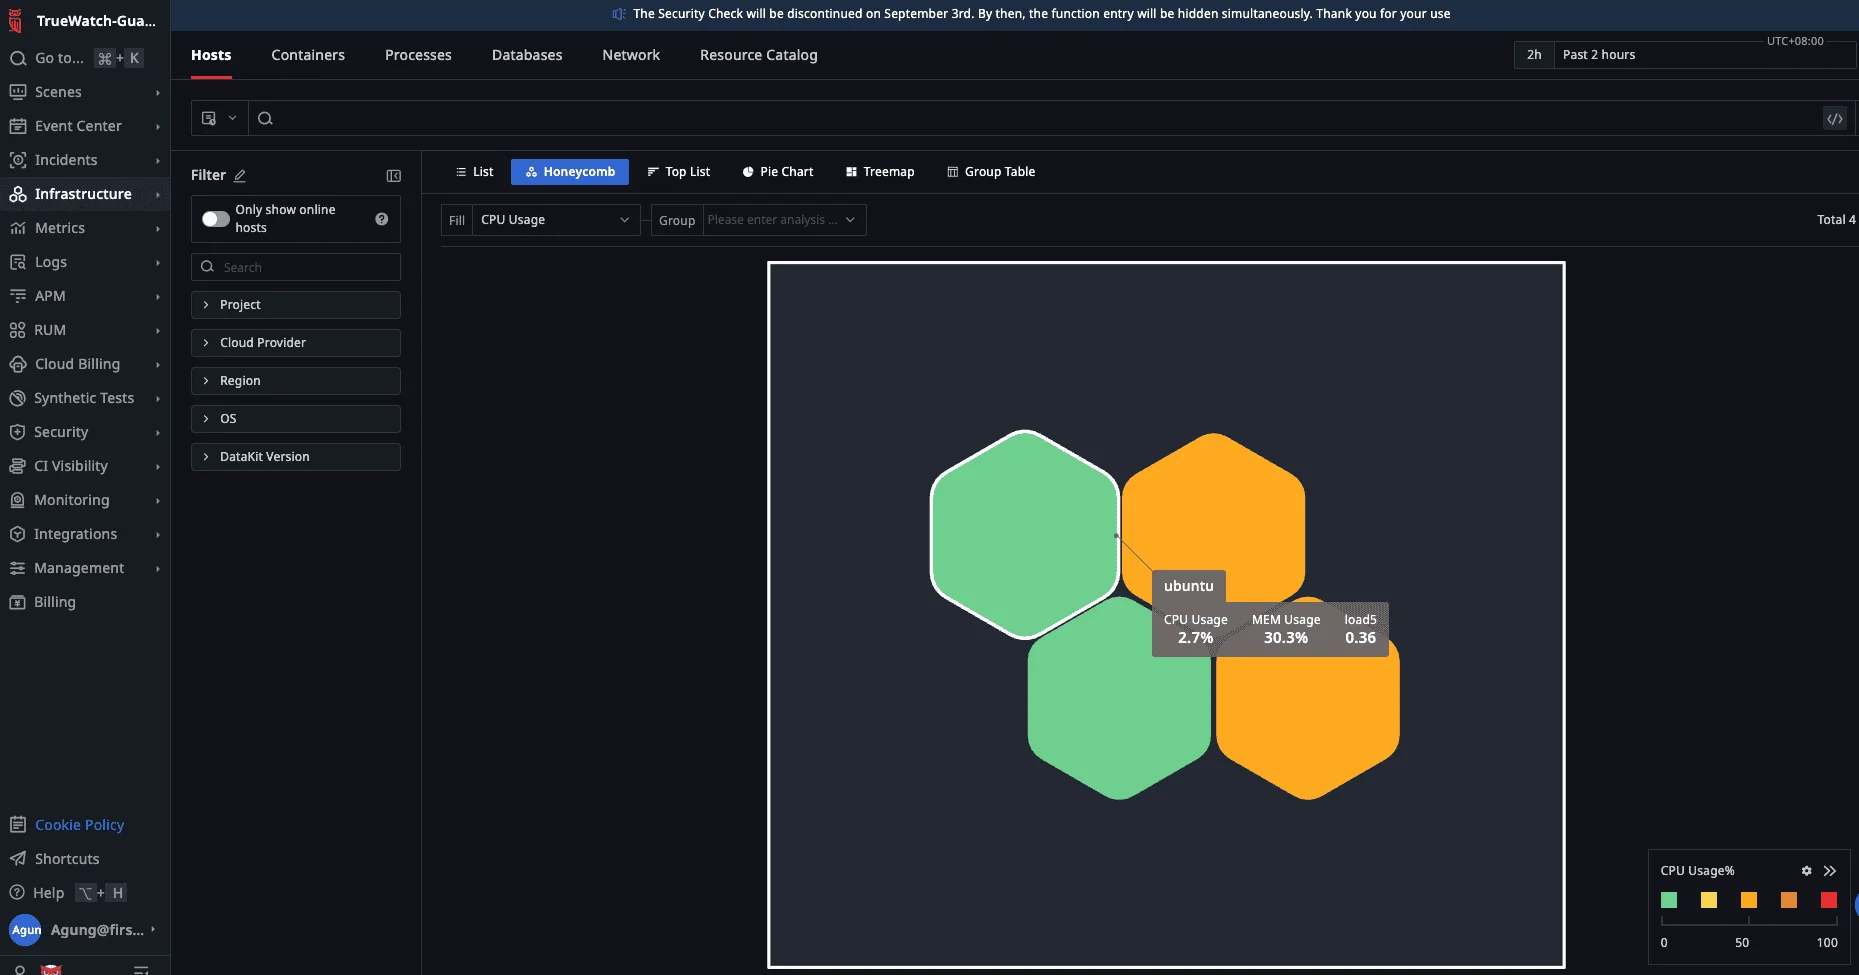
You should be able to see your host. Hover your mouse to see your host's at-a-glance key metrics (CPU, MEM Usage, load5).
-
Enable container monitoring, in this case Docker, by configuring Datakit container.conf:
- Go to your Linux console, change the directory to /usr/local/datakit/conf.d/container/. Then copy container.conf.sample to container.conf and restart Datakit:
cd /usr/local/datakit/conf.d/container
sudo cp container.conf.sample container.conf
sudo datakit service -R
Validate this by going to your Truewatch platform.
Navigate to Infrastructure > Containers. - Go to your Linux console, change the directory to /usr/local/datakit/conf.d/container/. Then copy container.conf.sample to container.conf and restart Datakit:
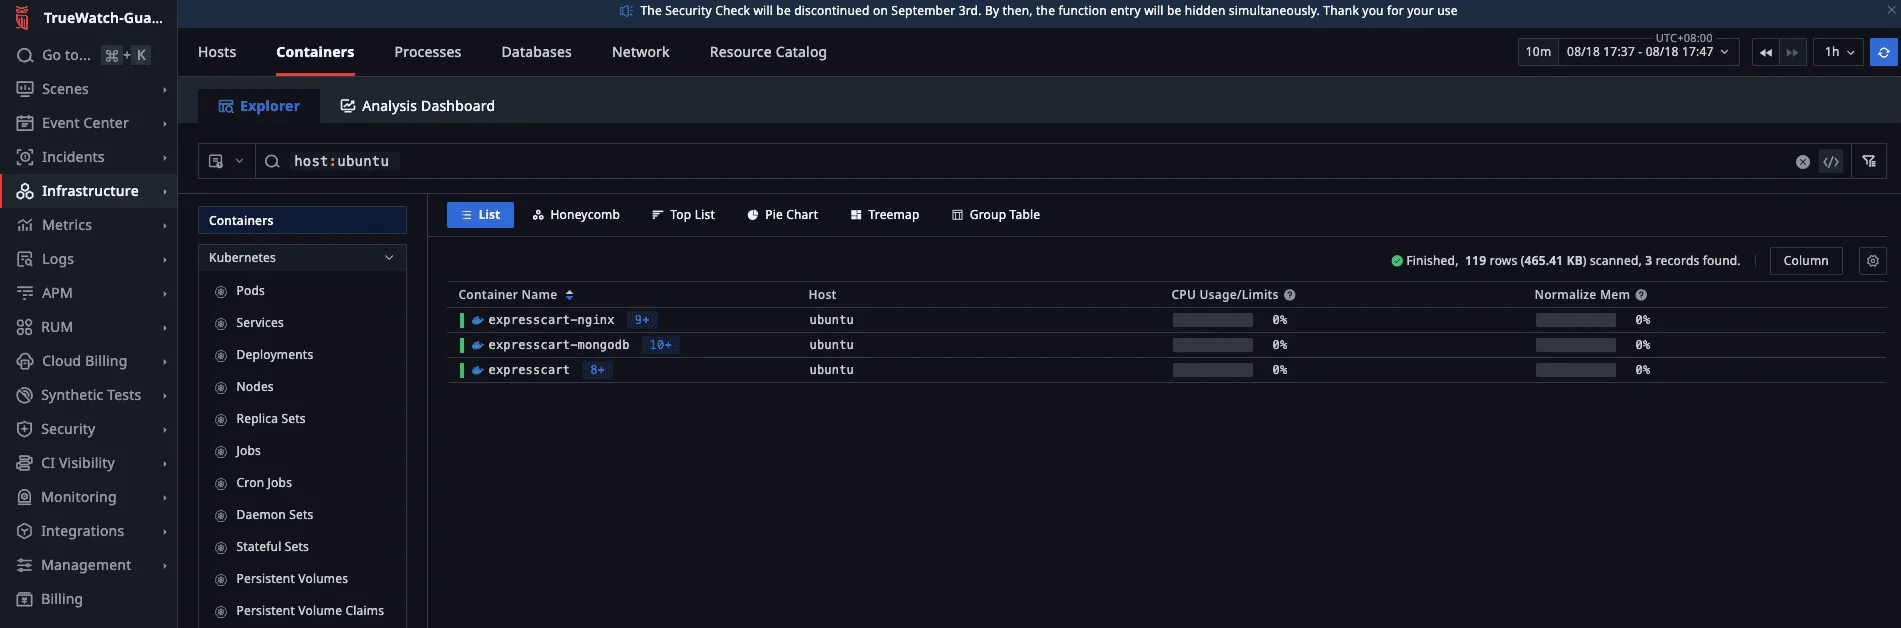
Explore Containers View by Clicking the names of the container
- Navigate to Scenes > New Dashboard. Under Template Name type Docker, hit enter. You'll get Docker Monitor View Template, Click on it. Give it a name and click confirm.
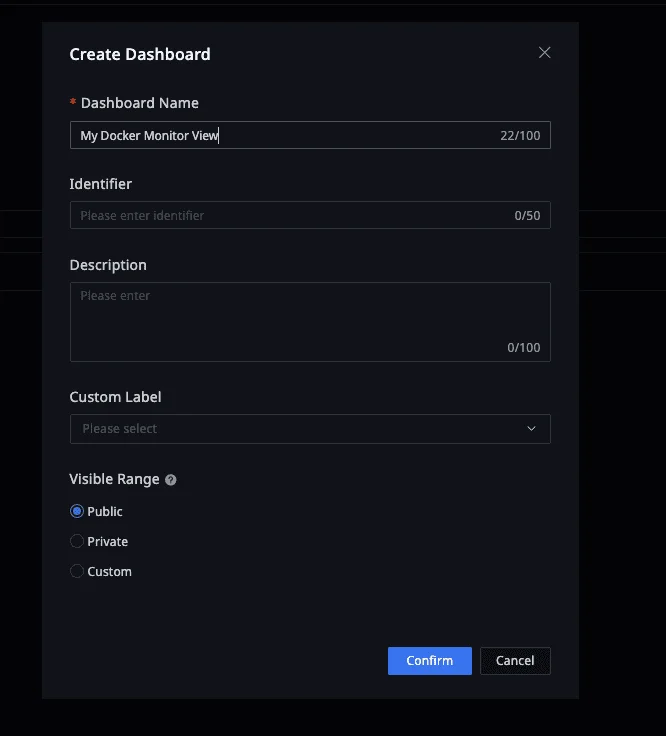
- After the above step, you'll arrive at the Docker Monitor View. Below is the example, you can apply filter using fields on the top left namely (Host Name, Container Name, Container ID).
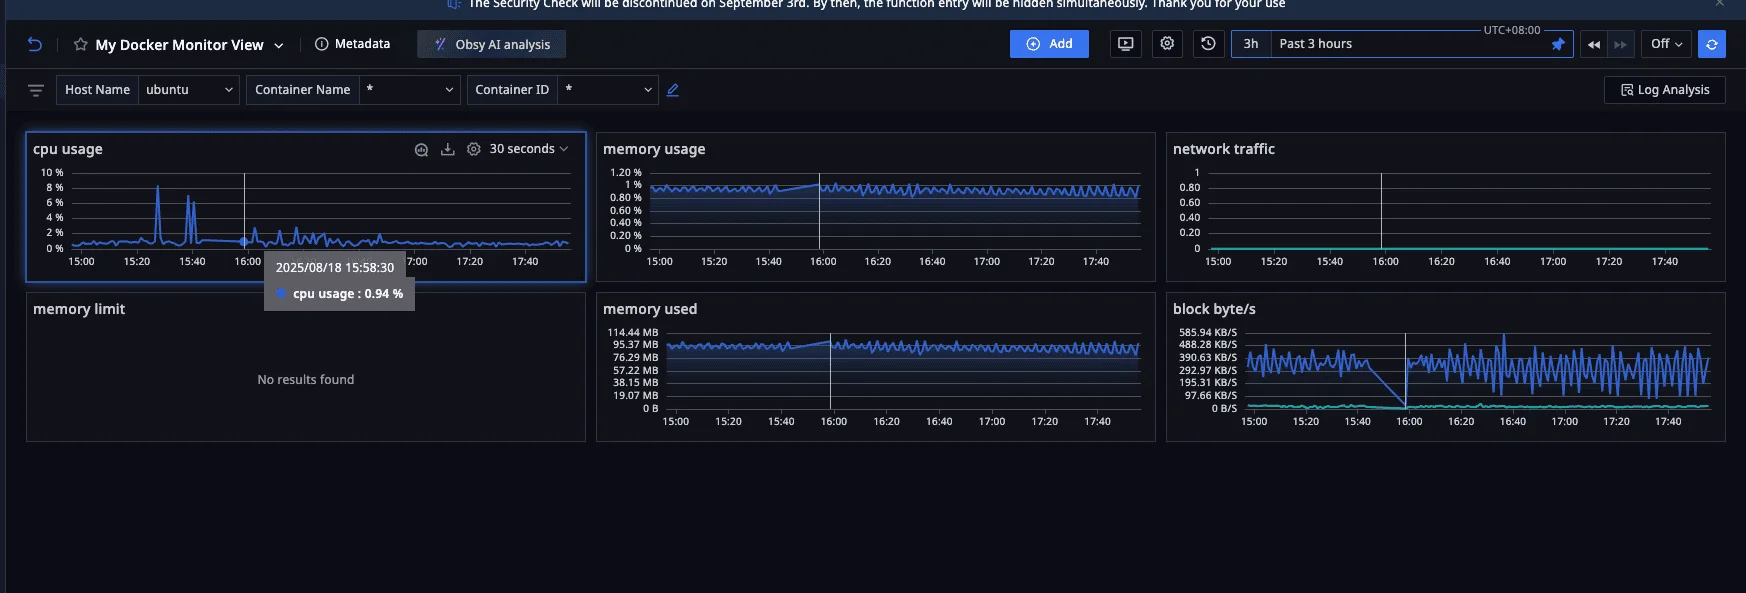
Infrastructure monitoring is essential for maintaining the health, performance, and reliability of your application environment. By using Truewatch, you gain real-time visibility into your servers, containers, and network resources. This enables you to quickly detect issues, optimize resource usage, and ensure a seamless experience for your users.
🌐 Steps to Set Up RUM
-
Go to your Truewatch platform, and log in with your Truewatch credentials.
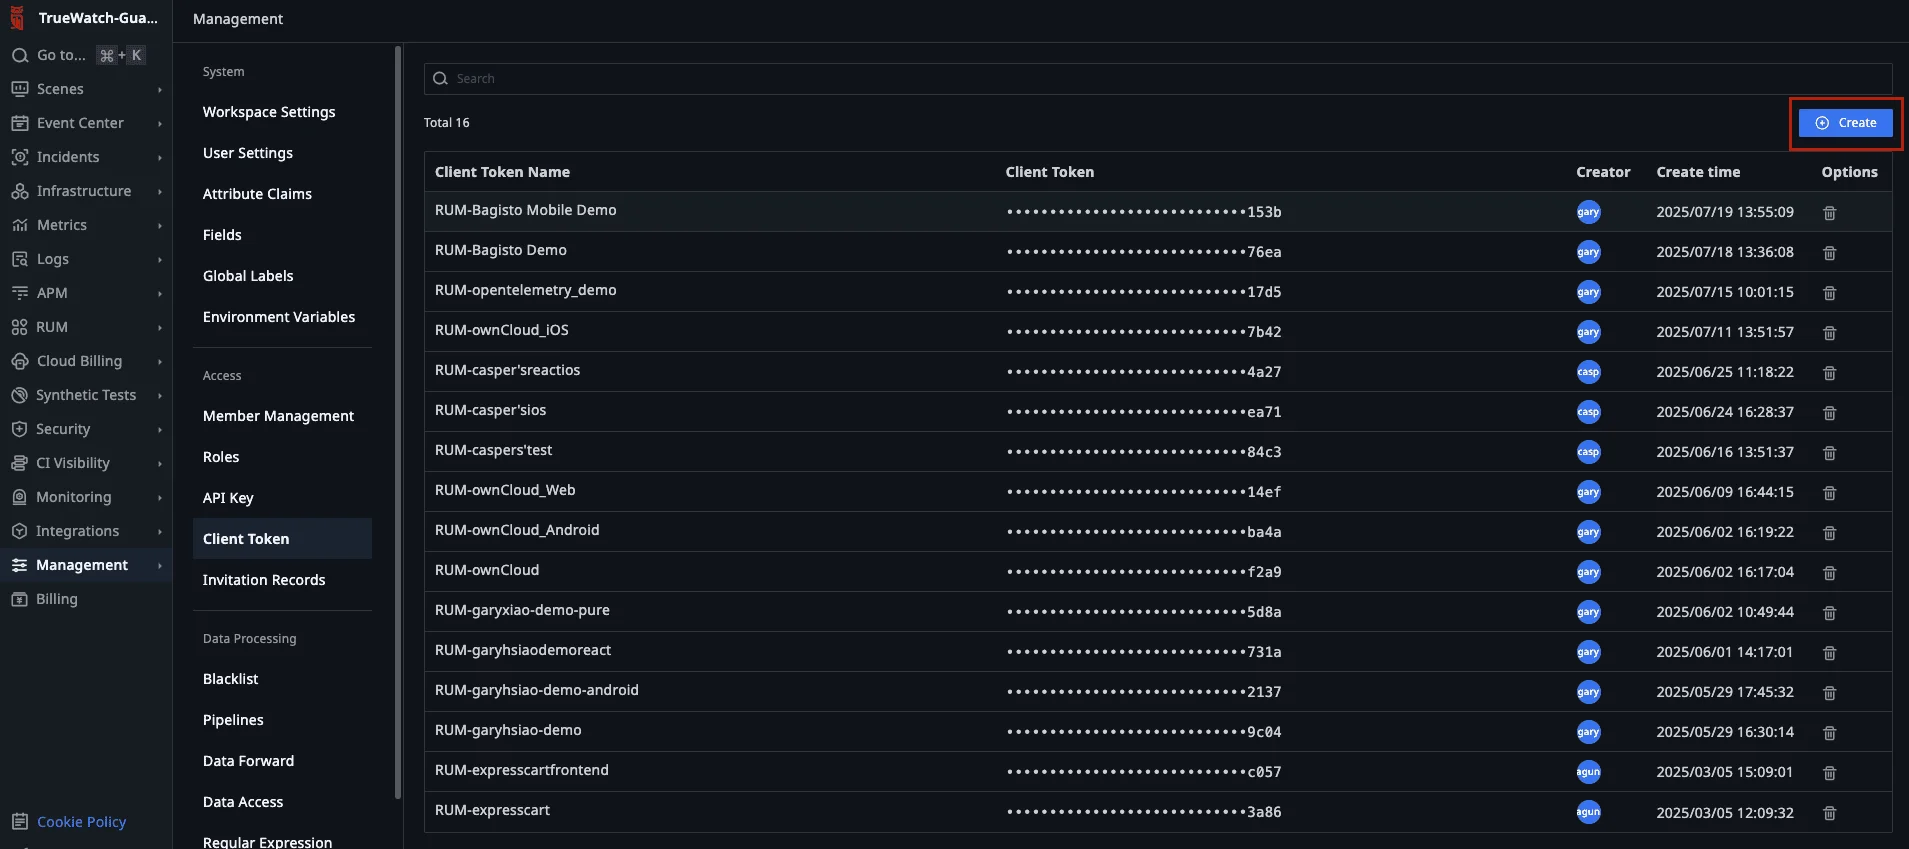
Create a client token:
Go to Management > Client Token > Create. Copy the newly created token and save it somewhere safe; you will need this for the next step.
-
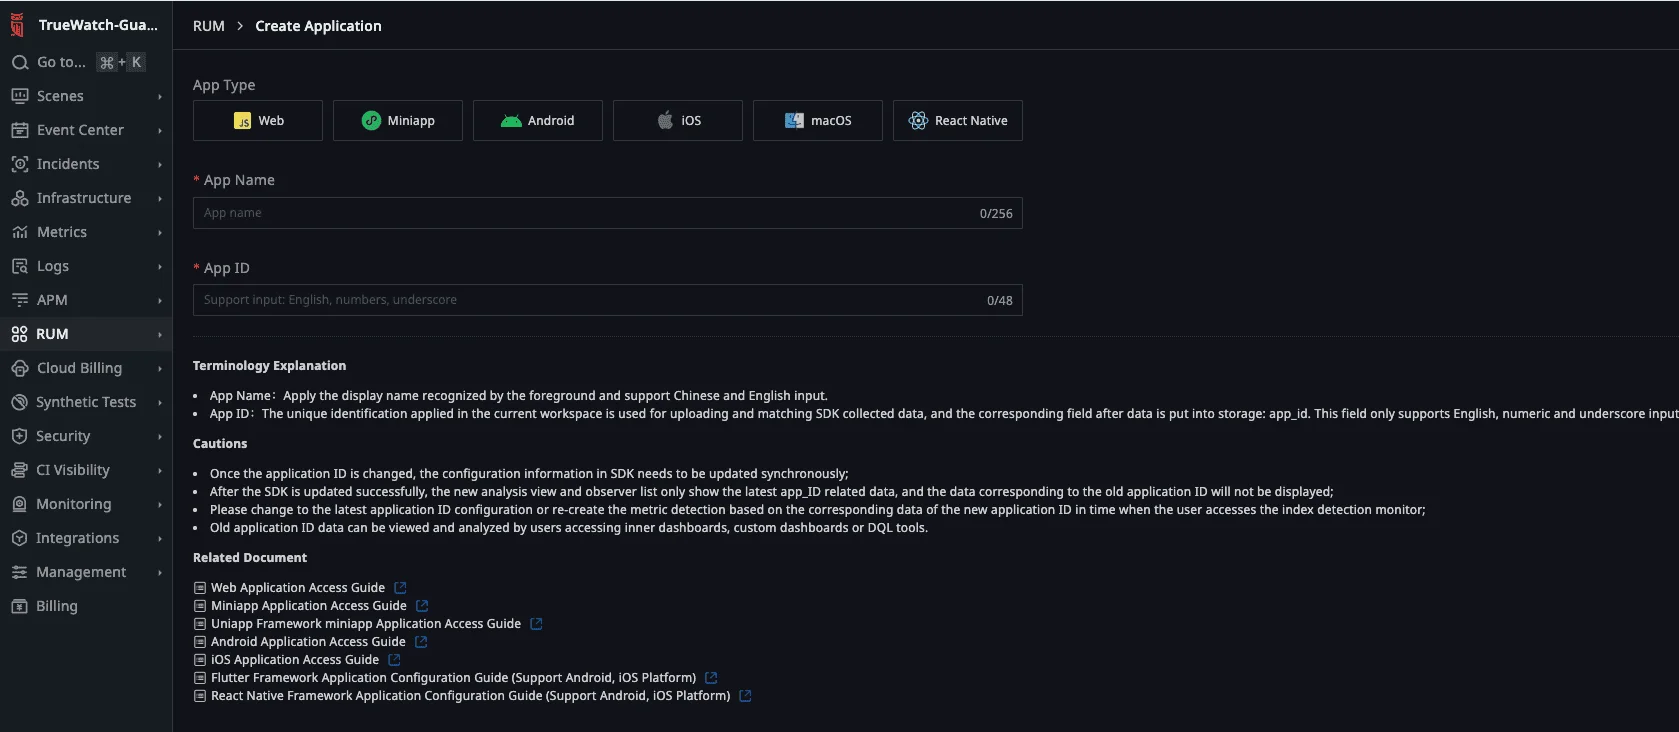
Log in to your Truewatch console and go to Real User Monitoring > Application List > Create Application.

- Select Web as the App Type. Enter a name for the application in the App Name field and specify the App Id.
- Select Public DataWay Deployment, then choose CDN Asynchronous Loading. Enter the Client Token you saved earlier in the clientToken section.
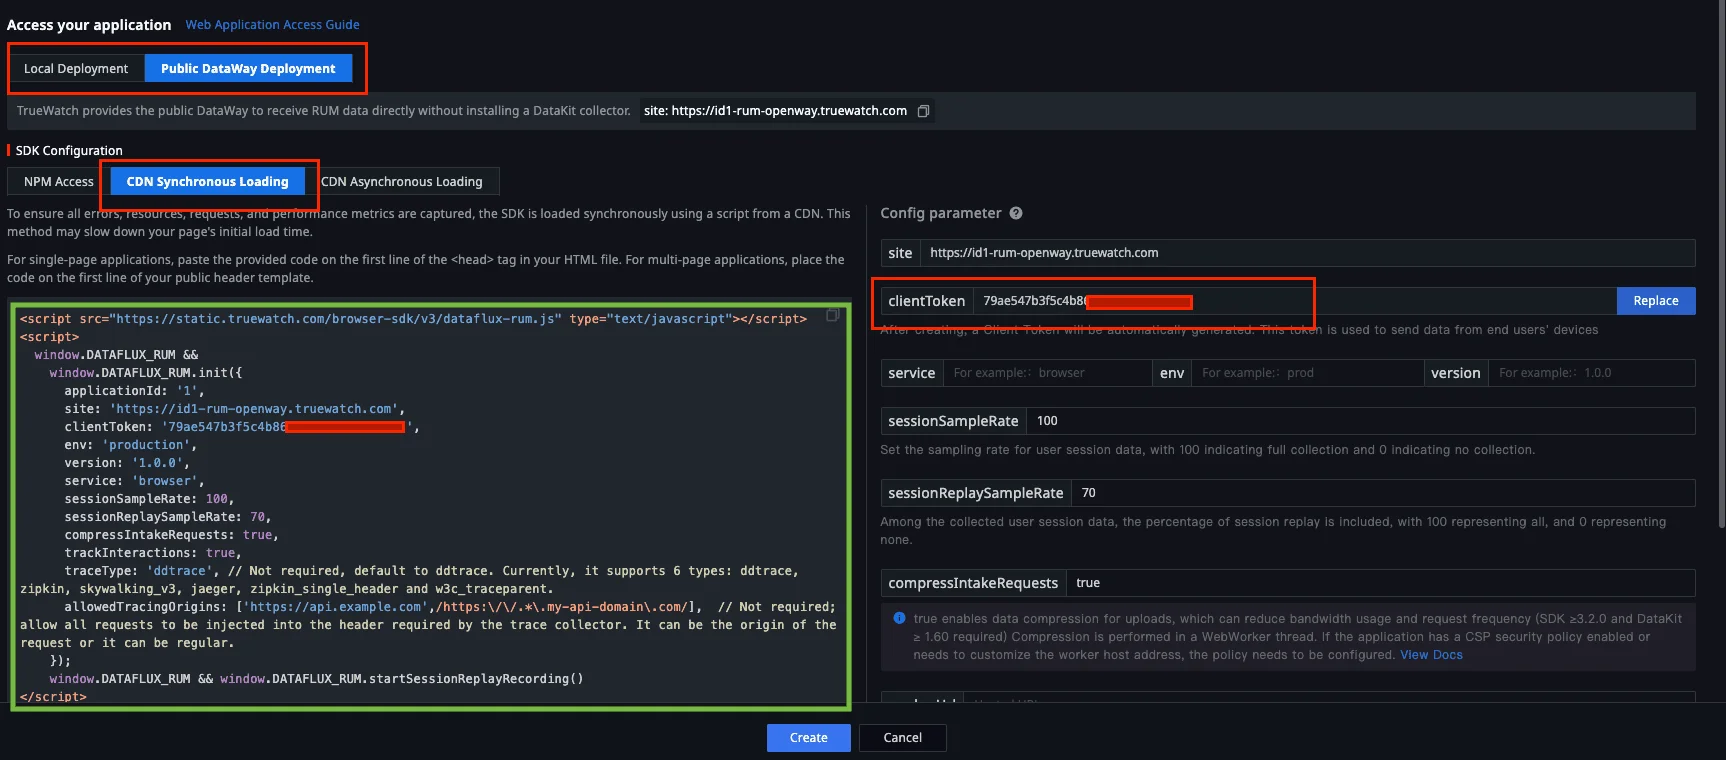
- Enter the following values (or values that best describe your application):
- service = frontend
- env = production
- version = 1.0.0.0

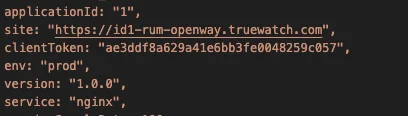
Copy the autogenerated script highlighted in green and save it in your favourite editor.
- Instrument Nginx to use the parameters above:
-
Go to your expresscart-demo-setup-guide directory on your console, navigate to nginx/conf.d
cd expresscart-demo-setup-guide cd nginx/conf.d/ -
Edit default.conf with your favourite editor, and paste the values from the autogenerated script in step 5.
-
Note: We configured Nginx to autoinstrument the RUM agent by injecting the script using the sub_filter directive, resulting in the RUM agent being instrumented into client browsers. Using this method, you don't have to modify your frontend HTML code. More on the Nginx sub_filter directive here.
-
Start and stop the services:
docker-compose down docker-compose up -d -
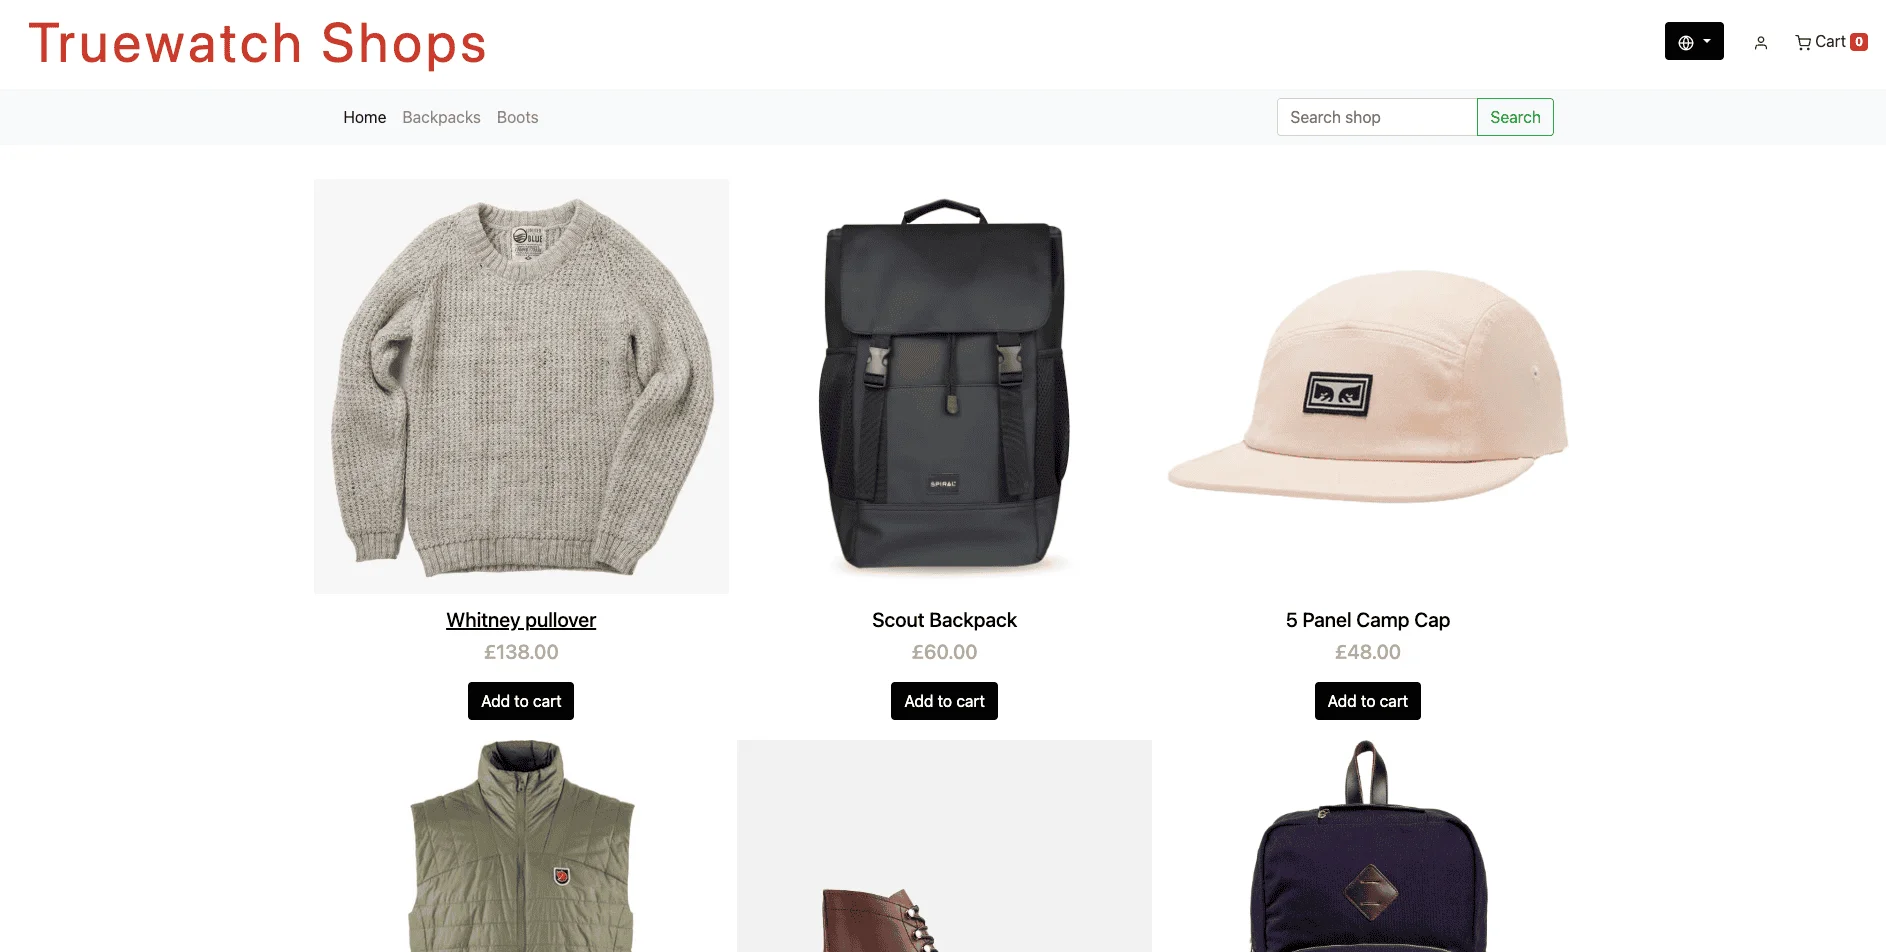
Open your browser and go to http://localhost:8080. You should be able to view your web app running on port 8080.

-
Interact with your app:
- Login with user [email protected] and password test.
- Simulate a user selecting a product to cart.
-
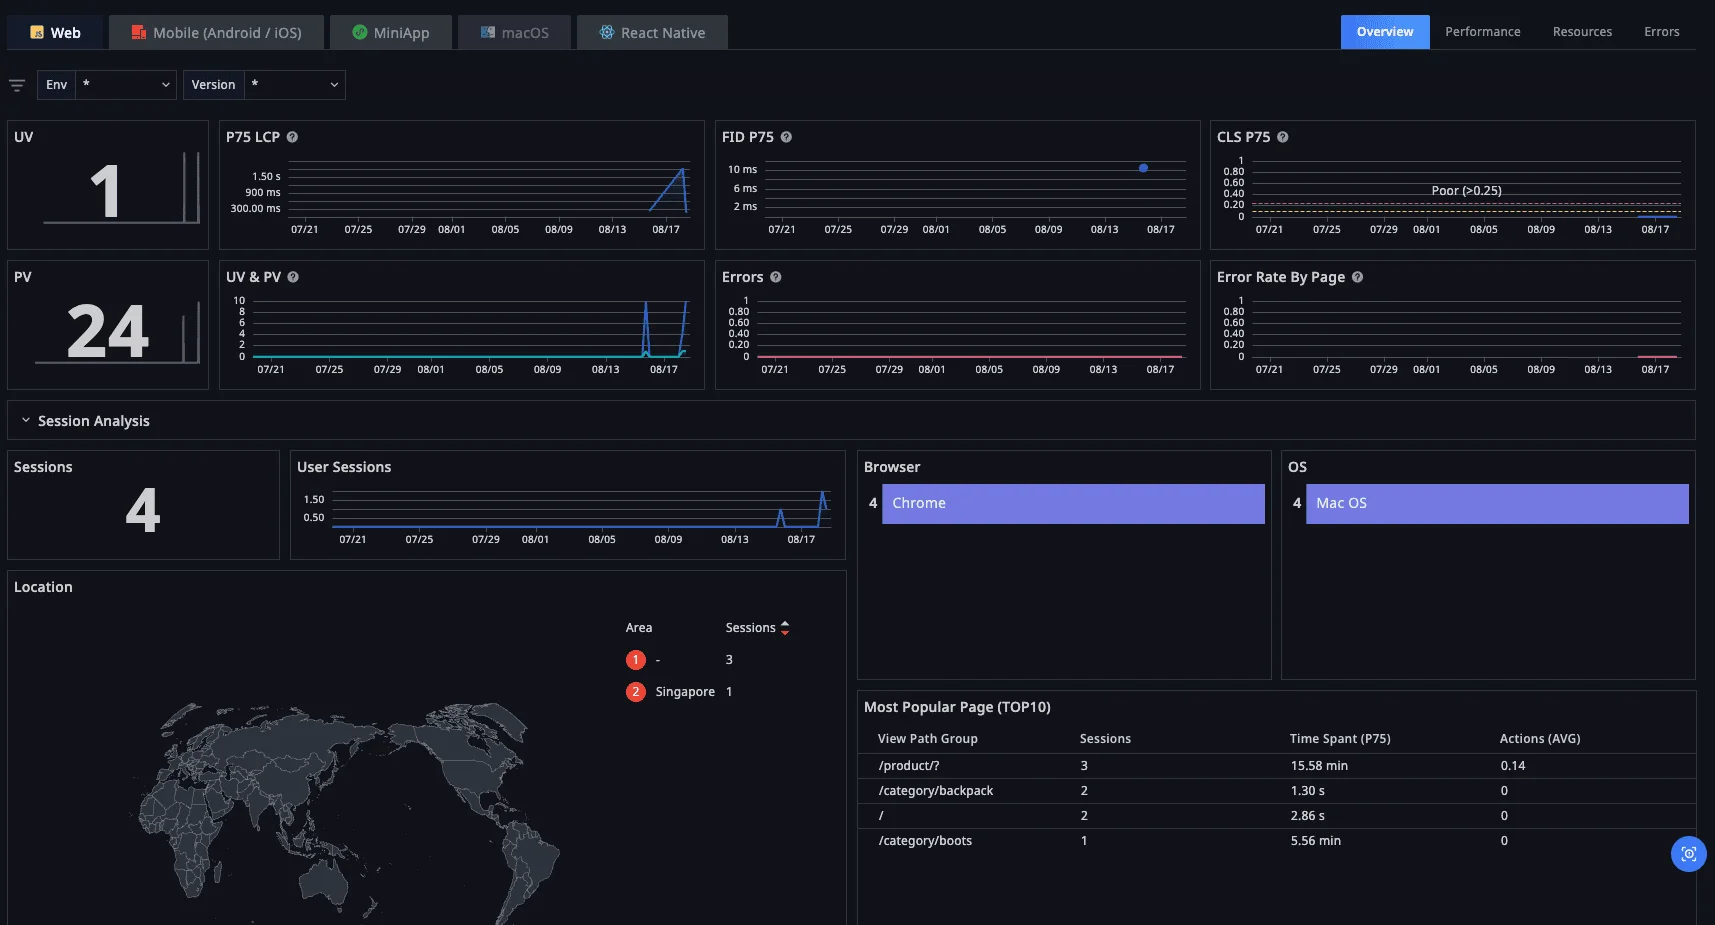
Go to your Truewatch Platform, go to RUM > Application, and select your App.
Observe statistics under Analysis Dashboard.